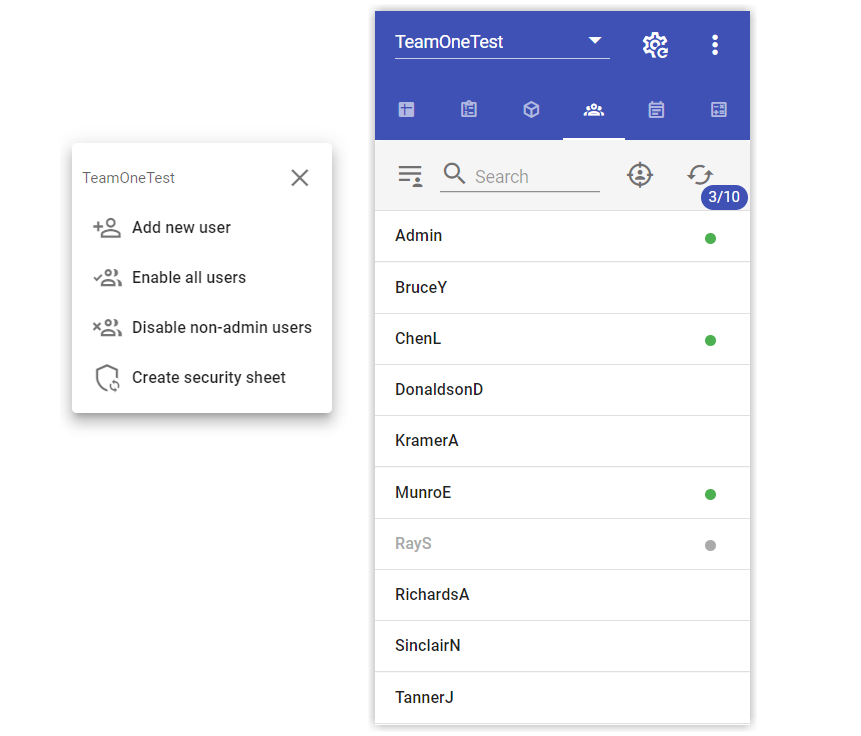
Users
On the users tab you can:
- see all users
- create new users
- enable/disable users
- see who is active
- logout users
- delete users
- manage security groups
Managing users and groups
Adding users
You can add individual user accounts using the Add new user menu option. We recommend using securitySheet for managing all users and groups and automatic syncrhonization into TM1.
Modifying user groups
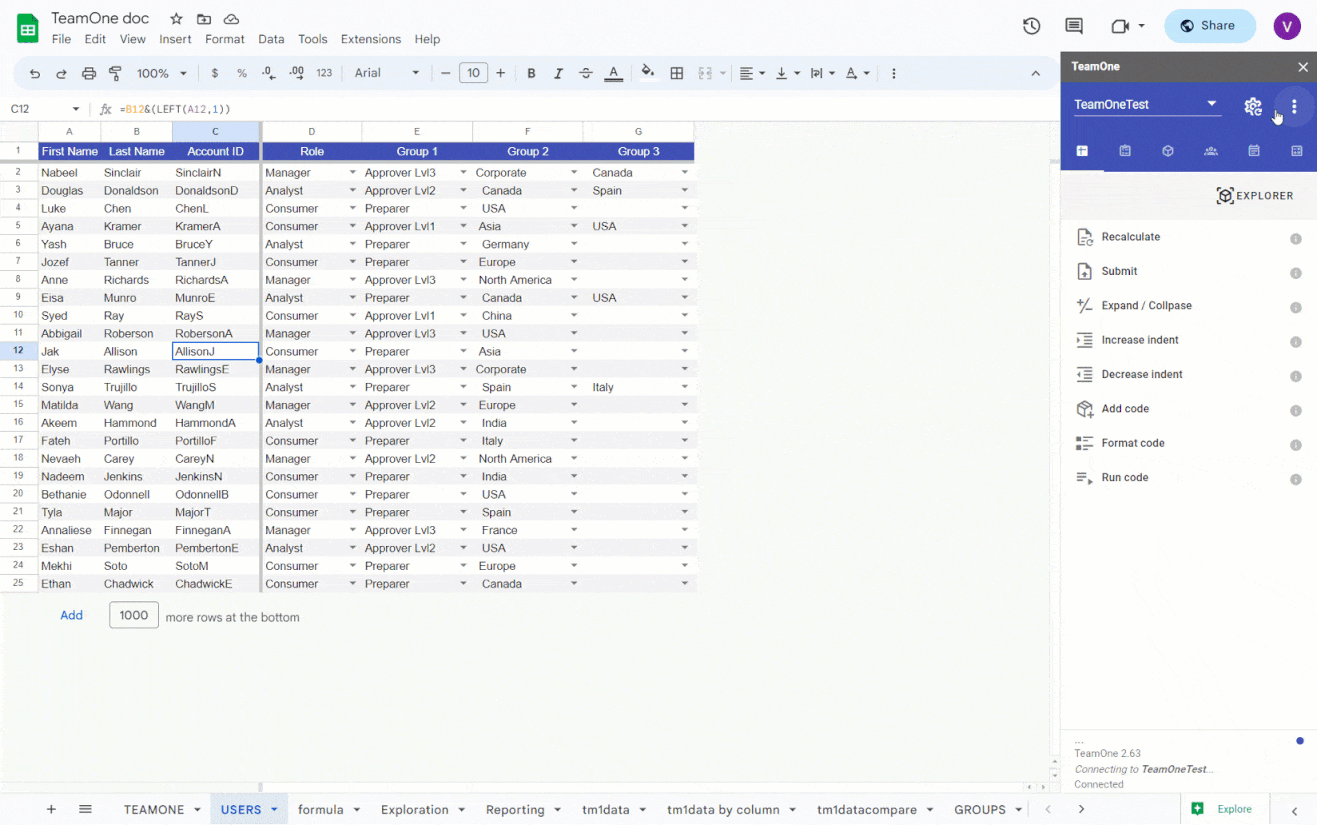
Click any user to modify their security groups and perform user actions. Use checkboxes to specify user's groups. By default the selected groups are displayed first, so if you select a new group it will move to the top. To change this behaviour click the Group header to order groups by name:
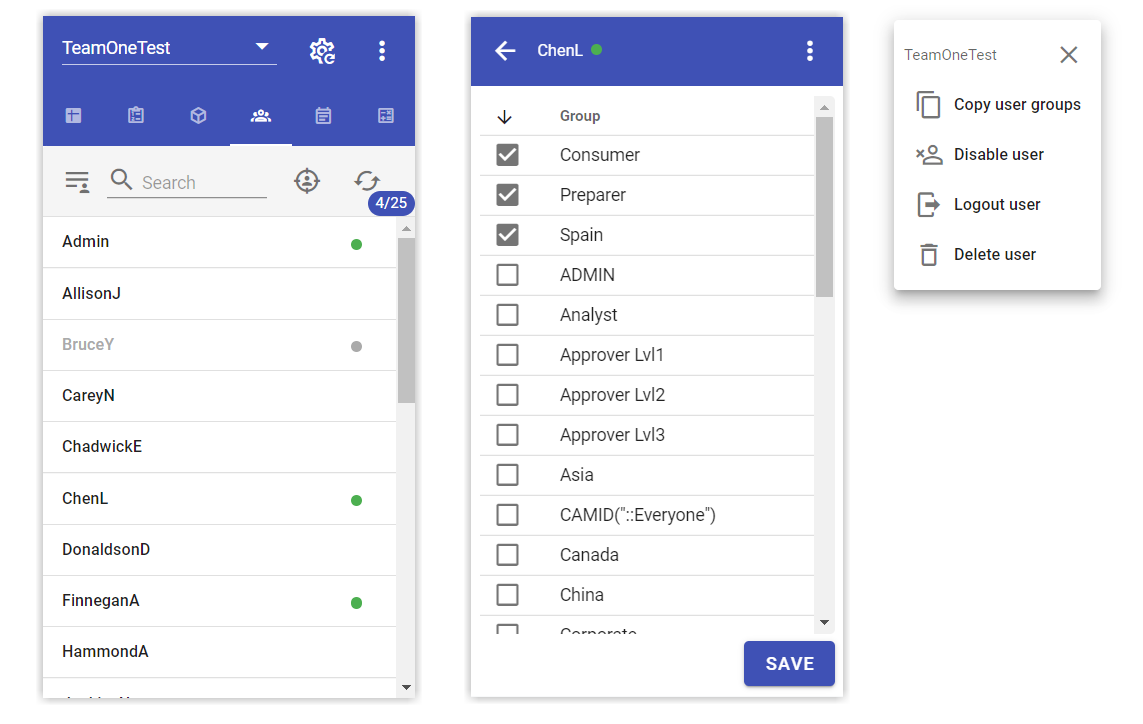
You can access user action menu by clicking the three dots button at the top right corner. Depending on the user current status, the menu will contain the following options:
- Delete user
- Logout user (available for active users only)
- Disable user (available for enabled users only)
- Enable user (available for disabled users only)
- Impersonate user
Copy to clipboard
Click the user name to copy it to clipboard
Disabling users
You can disable all non-admin users from the users menu or you can disable individual users by clicking the Disable user menu option on the user screen. This option does not show up if a user is disabled. The option is greyed out if the selected user belongs to ADMIN security group.
TIP
The Disable non-admin users feature is handy when you want to deploy a release, reload some big dimensions or do any other tasks and you would like to prevent object locking by possible users interactions.
Enabling users
You can enable all disabled users from the users menu or you can enable individual users by clicking the Enable user menu option on the user screen. The option does not show up if the selected user is enabled.
Copying user groups
You can copy/paste groups from one user to another one, which will replace all the tager user groups.
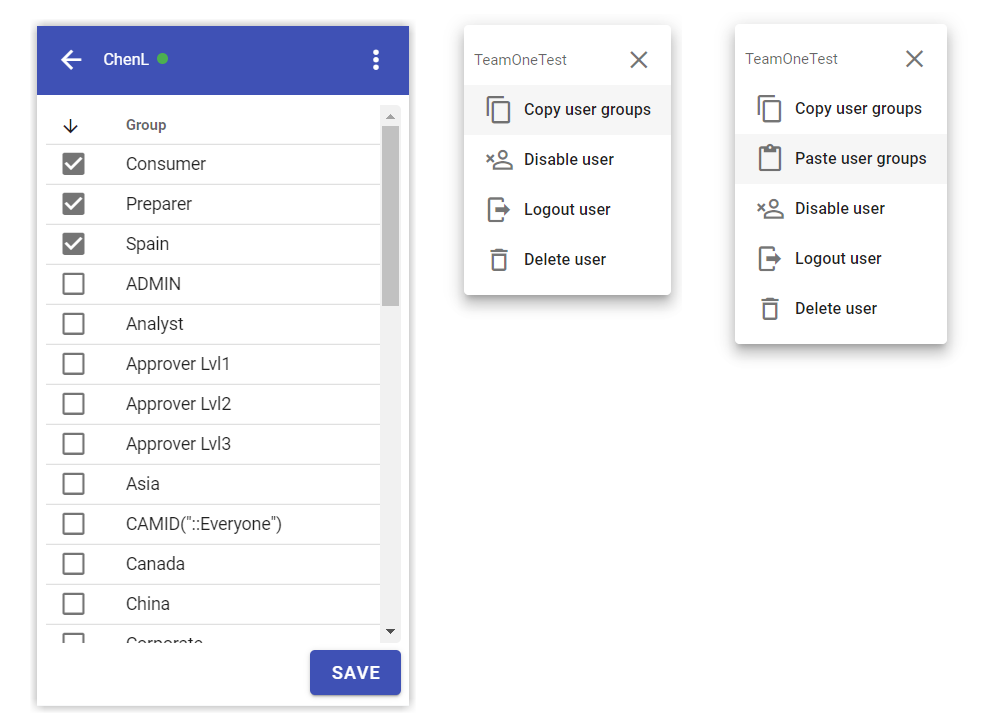
TIP
When you click Copy user groups, the group list is also copied to your clipboard so you can paste it in a sheet or as a text anywhere.
Deleting users
Use the Delete menu to delete the user
Logging out users
Use the Logout menu option on the user screen to logout the selected user. The option is displayed for active users only.
Impersonating users
Use the Impersonate menu to impersonate the selected user. When you impersonate a user, you can see cubes and dimensions (on the model tab), dimension elements in the subset editor as the selected user. The exploration data will also be refreshed based on the impersonated user credentials. In addition, the impersonate icon will be displayed at the top, you can click the icon to disable impersonification:
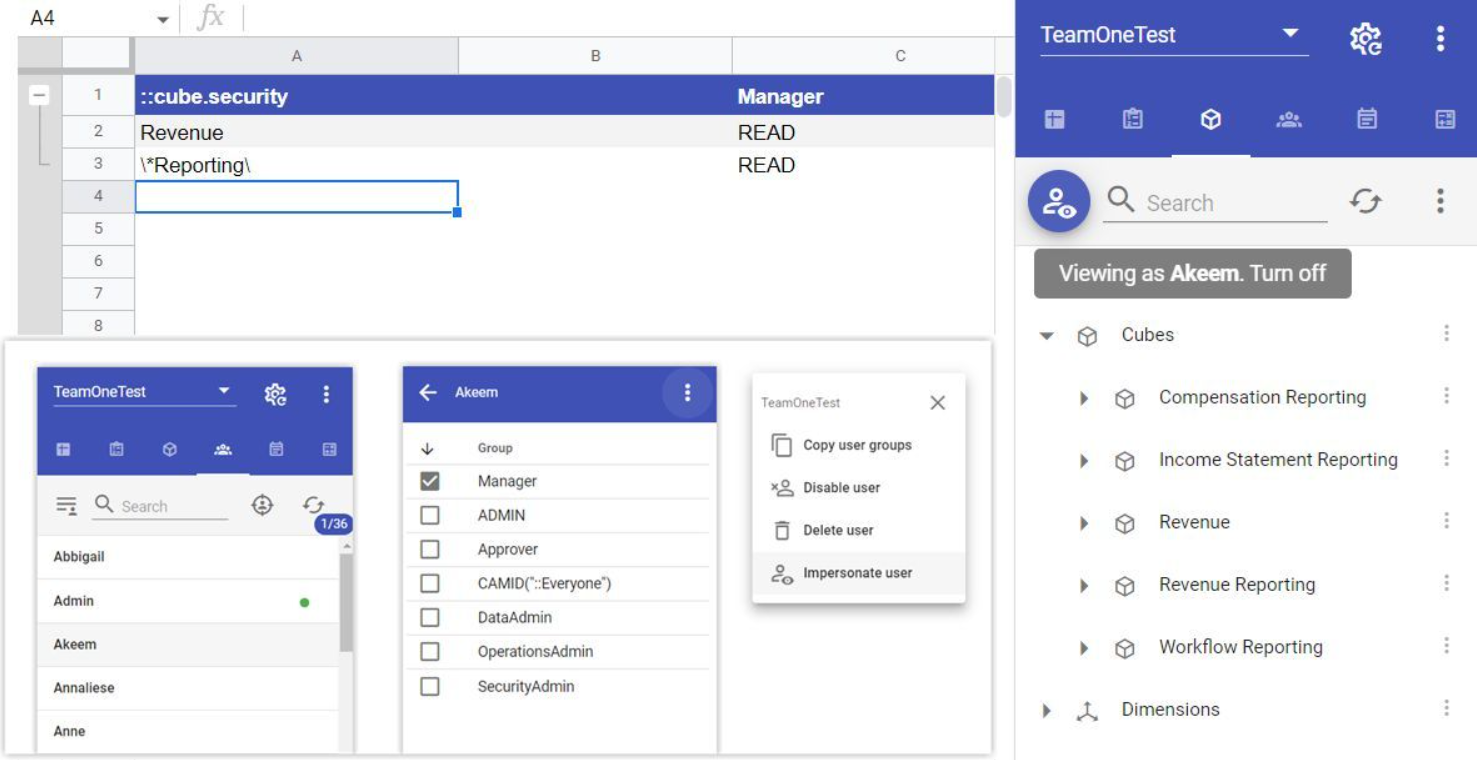
Security sheet
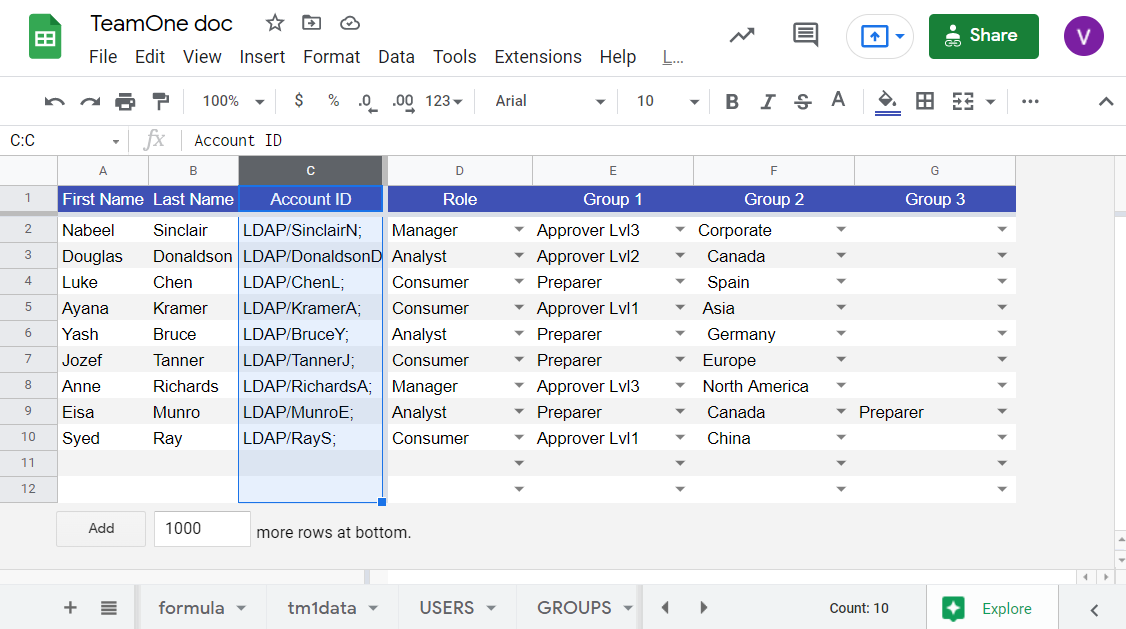
When defining a ::tm1env you can specify -securitySheet parameter and indicate the sheet which you want to synchronize users, groups and assignments from. By default TeamOne will look for user IDs in column 1 (groups shoud follow after the user ID column) and will skip 1 header row. This can be customized by specifying the -startRow and -startColumn parameters. If the -securityRecreate parameter is checked, TeamOne will delete all non-admin users first, then will recreate all users and setup their group assignments. Once you configure -securitySheet, the sync security option will become available in the sidebar menu:
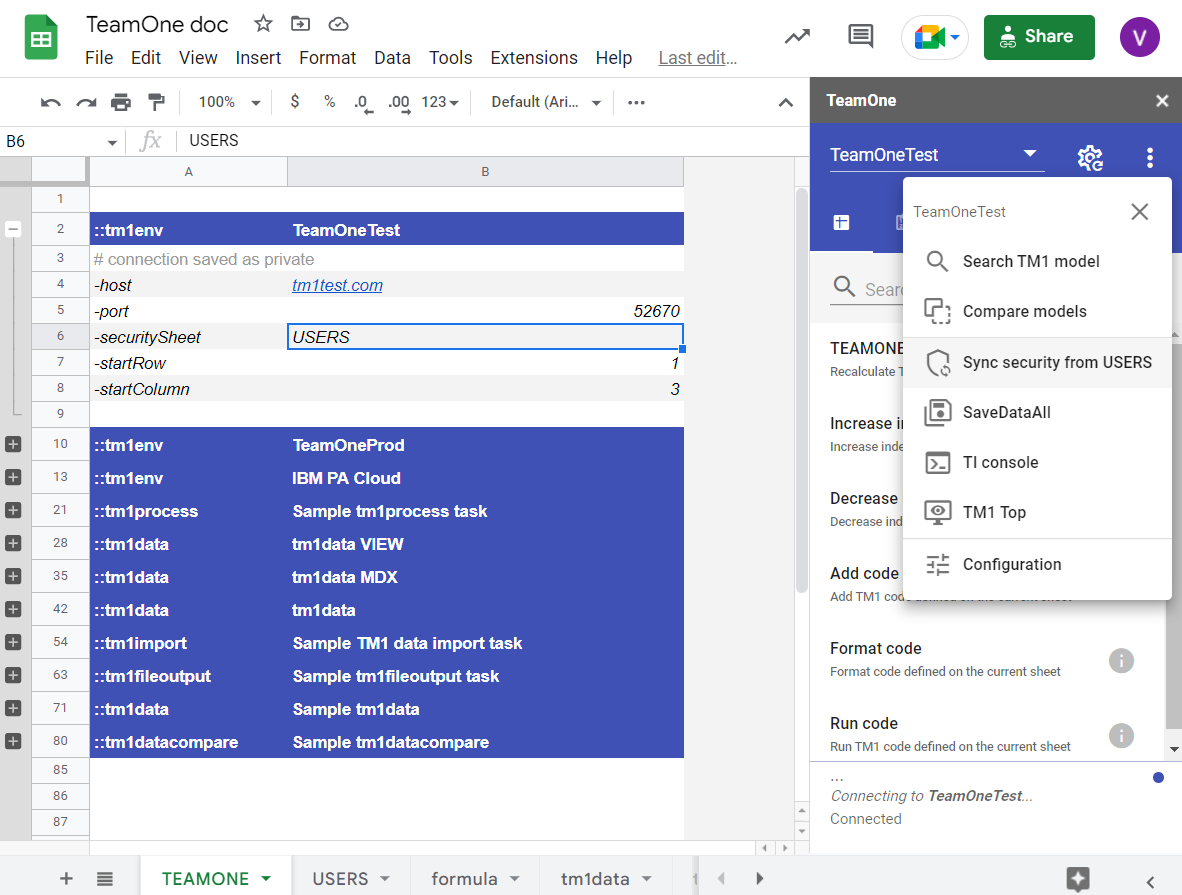
The easiest way to make a users sheet is to use the Create security sheet option, which will insert a new sheet and add all users & groups there. You will just need to set the sheet name as the securitySheet option value.
Using Google Sheets Data > Data validation feature it is possible to create a group dropdown by selecting your group list range:
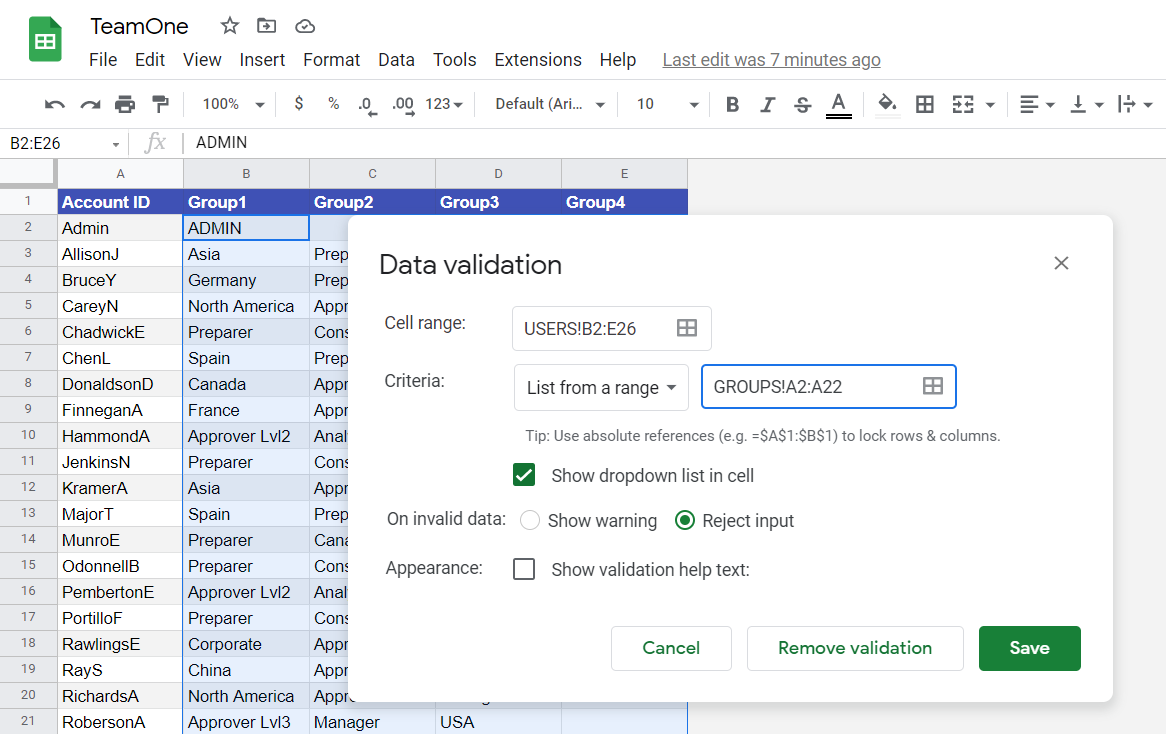
Now you can search and assign groups from a dropdown:
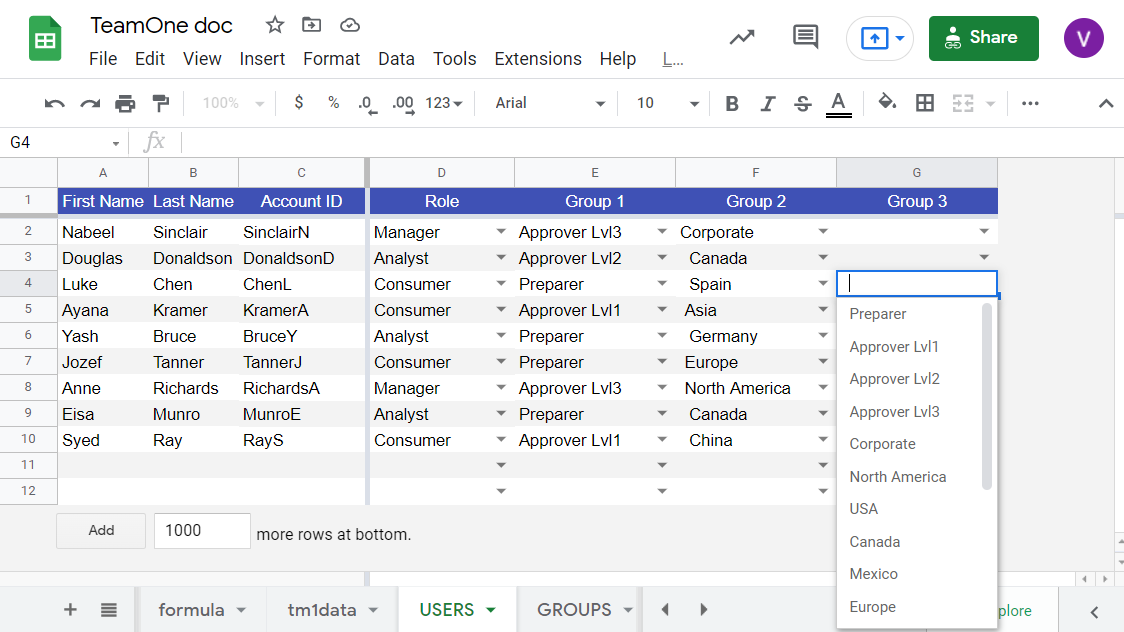
"Hierarchy-like" group dropdowns
You can prepend spaces to your group names so they appear like a hierarchy in dropdowns. TeamOne will automatically trim all spaces when updating the security in TM1.
If using namespace in ::tm1env definition, you can prepend the user IDs with namespace/ and add semicolons at the end (TeamOne will strip it when creating/updating users in TM1). This will allow you to add all users to a Cognos group in one shot using the type method. Do not use CAMIDs in user ID column.
New users and groups
New users and groups will be created if they do not exist.
Access
Use Data > Protected sheets and ranges to give certain users (usually some managers) access to update users and groups.
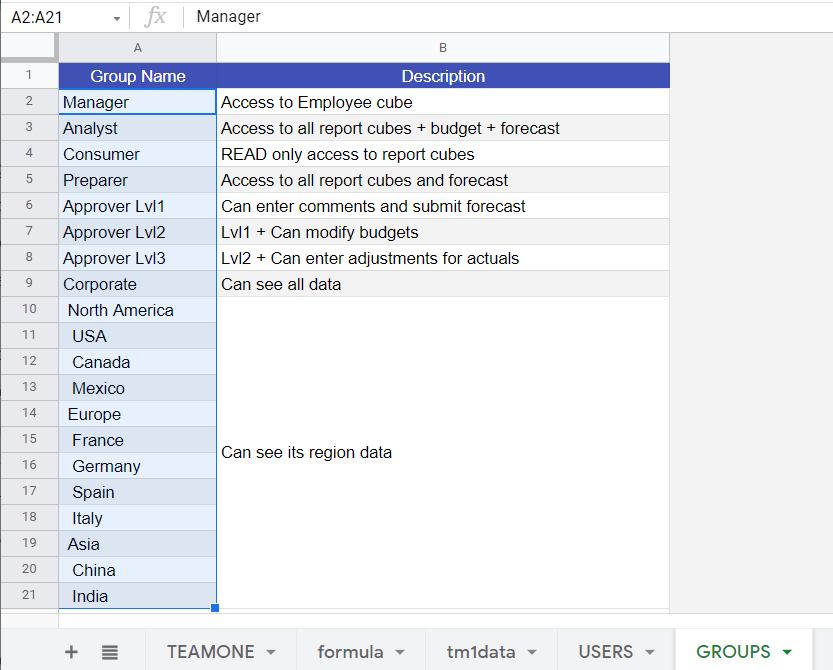
See sheetName parameter example
See Users and groups sheet example
TM1 Top
Users threads
You can open TM1 top from the sidebar menu. It displays all users sessions, including info about the used interface (Architect, TM1Web or REST API) and what they are doing at the moment. For instance, if someone is executing a process, you will be able to see the process name and the execution time.
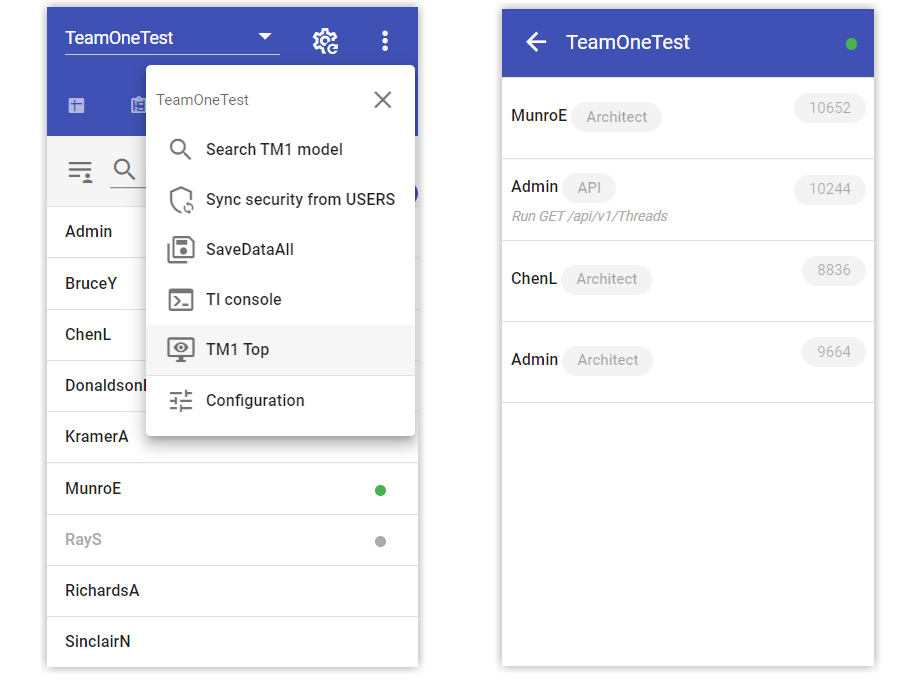
Killing threads
You can click a user thread to cancel it.
Security tracer
Using TeamOne Security tracer you can quickly and easily troubleshoot users access and instantly get the full picture of TM1 cube, dimension, hierarchy, element and data security. Simply select a user and a cube cell and TeamOne will show and explain the user's security level.
TM1USER() function
TeamOne Security tracer may produce incorrect results if using TM1USER() function in security cube rules, since it will be evaluated to the current account used to login from TeamOne.
}CubeProperties
Currently TeamOne Security tracer does not support CELLSECURITYMOSTRESTRICTIVE and CELLSECURITYDEFAULTVALUE values set in }CubeProperties cube. Though those settings are rarely used in IBM PA projects, we will be adding it in the future TeamOne versions.