Configuration
SPACE settings
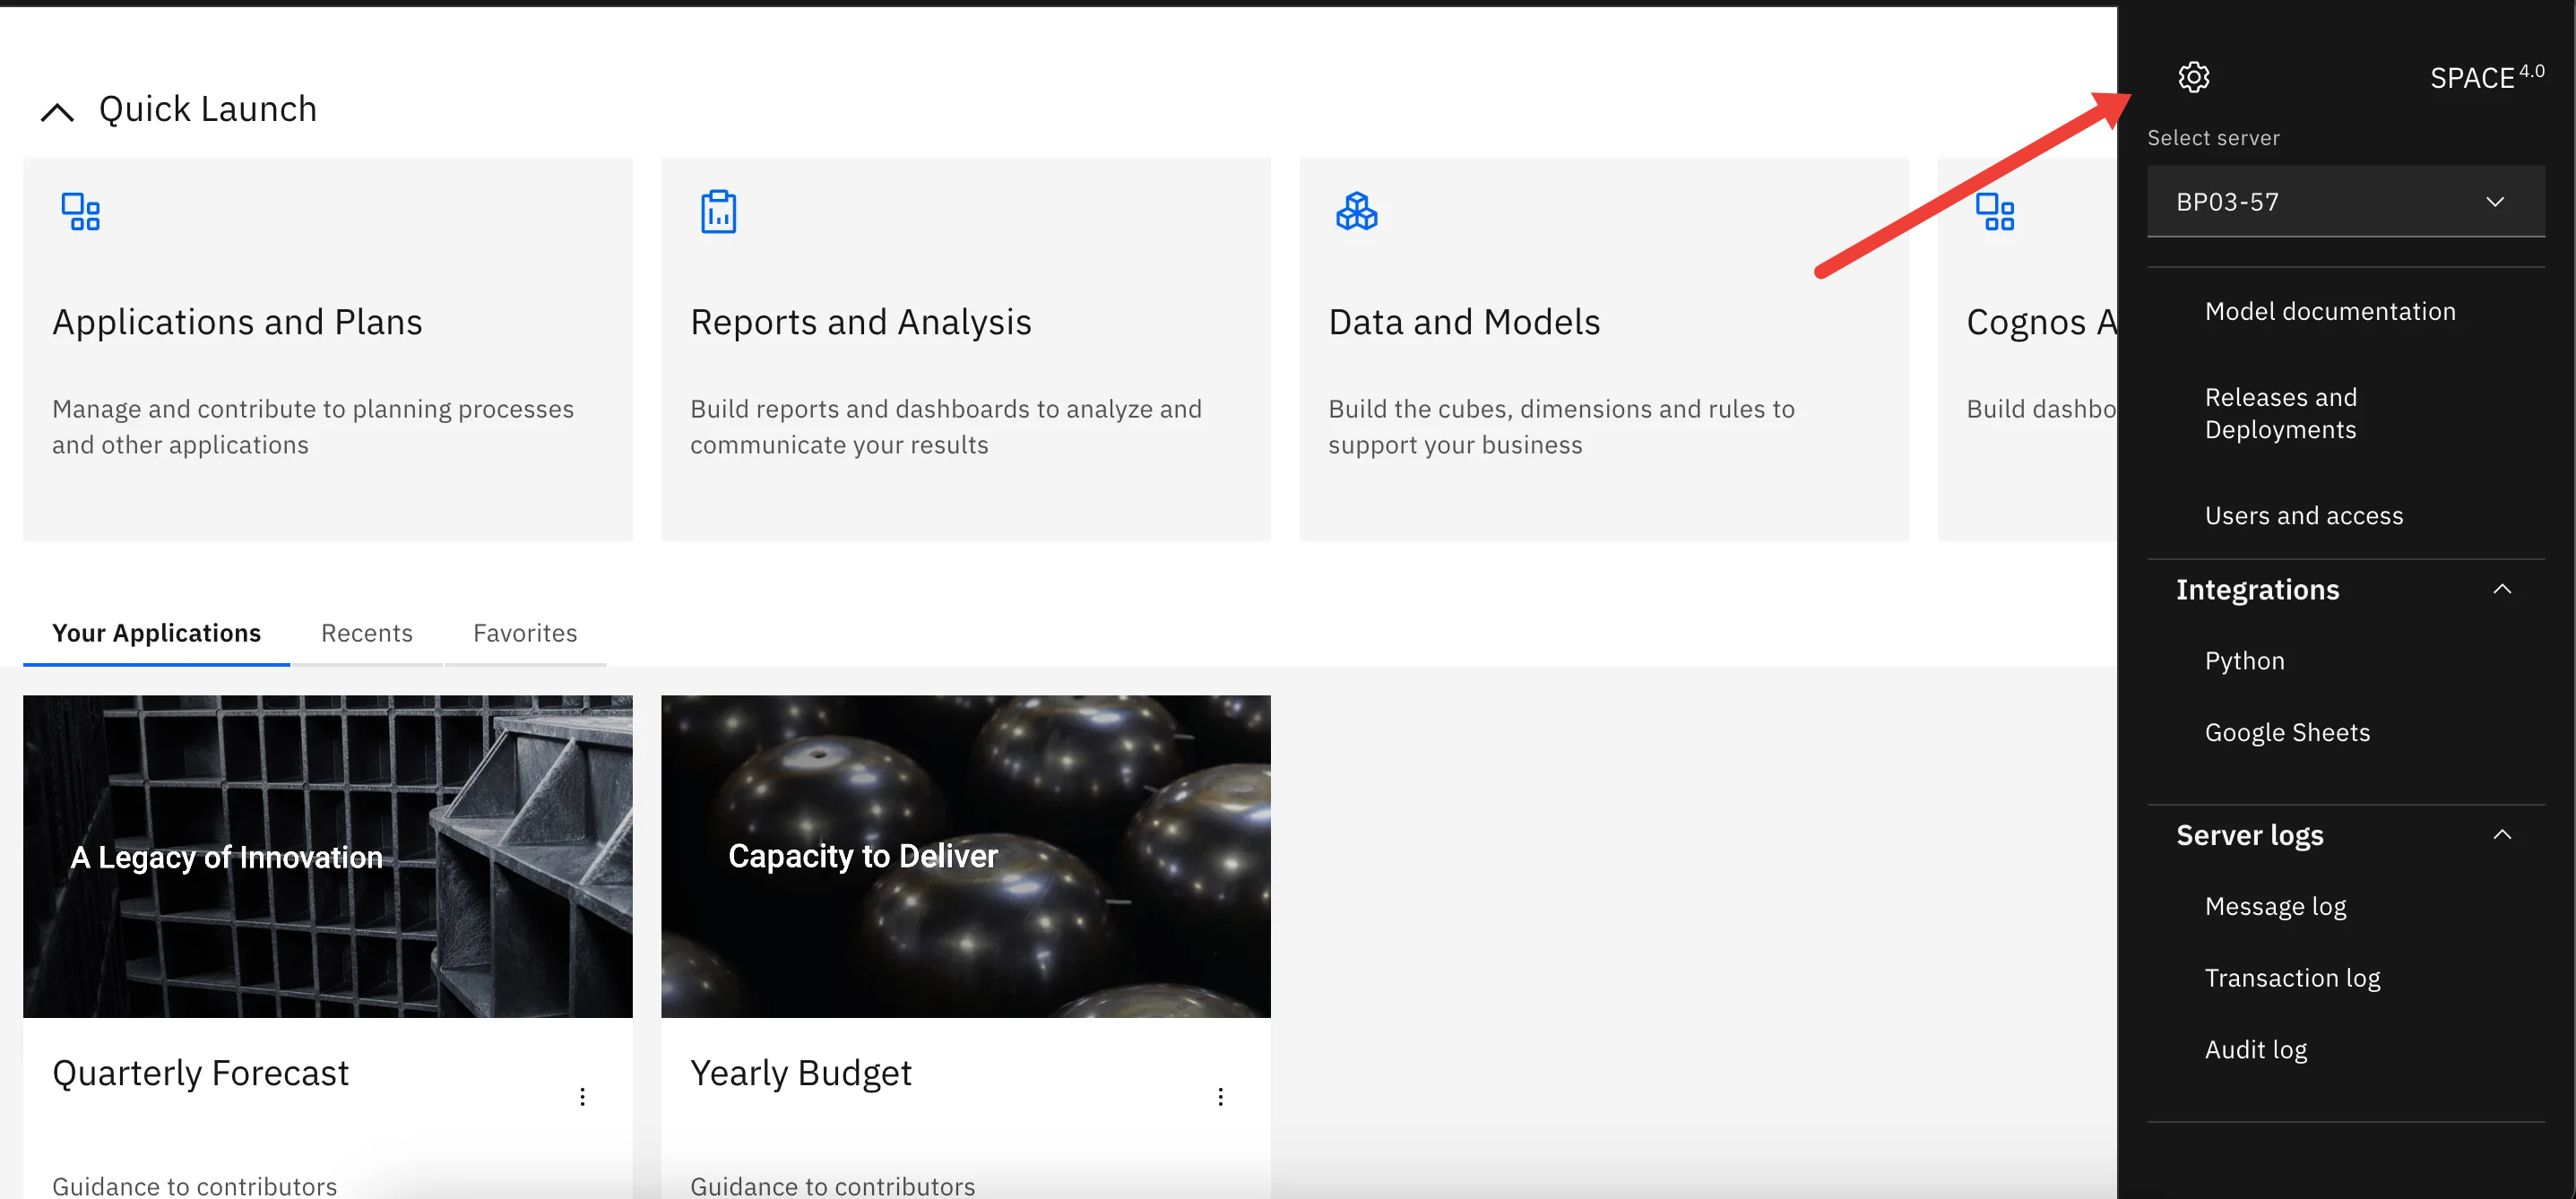
To manage your settings, simply open the SPACE sidebar and click on the settings icon:
My environments
Use the My environments tab to register every IBM Planning Analytics Workspace (PAW) URL your users need to access through SPACE.
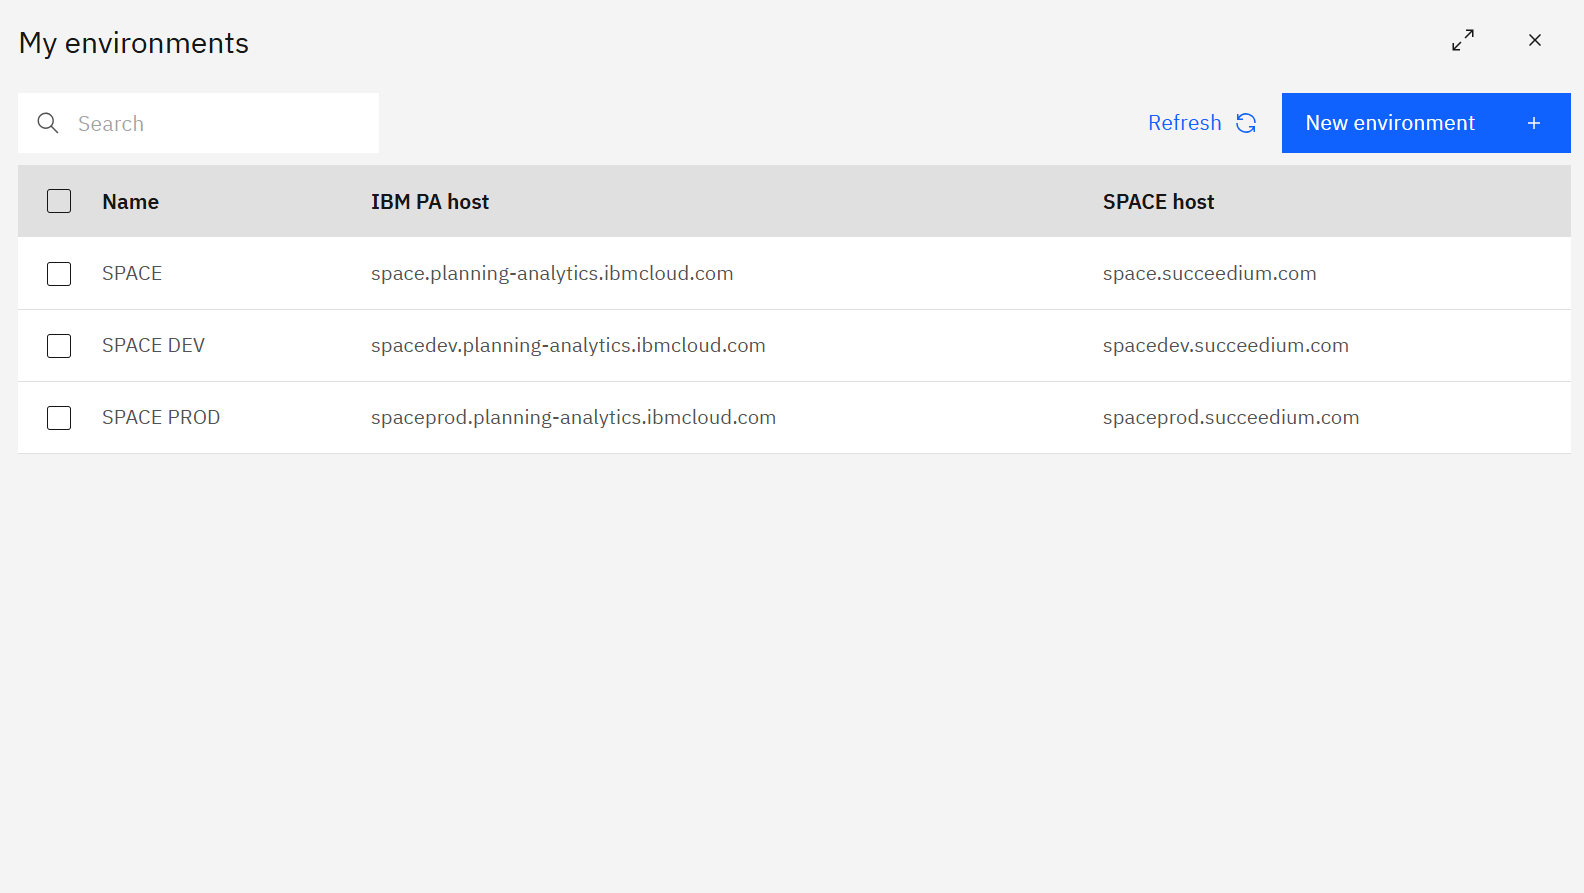
Each row stores the environment name, IBM PA host, and SPACE host. Select an environment to edit or delete it, or use the Refresh button after changes to pull the latest metadata from the server.
Adding or editing an environment
Click New environment (or open an existing row) to launch the form.
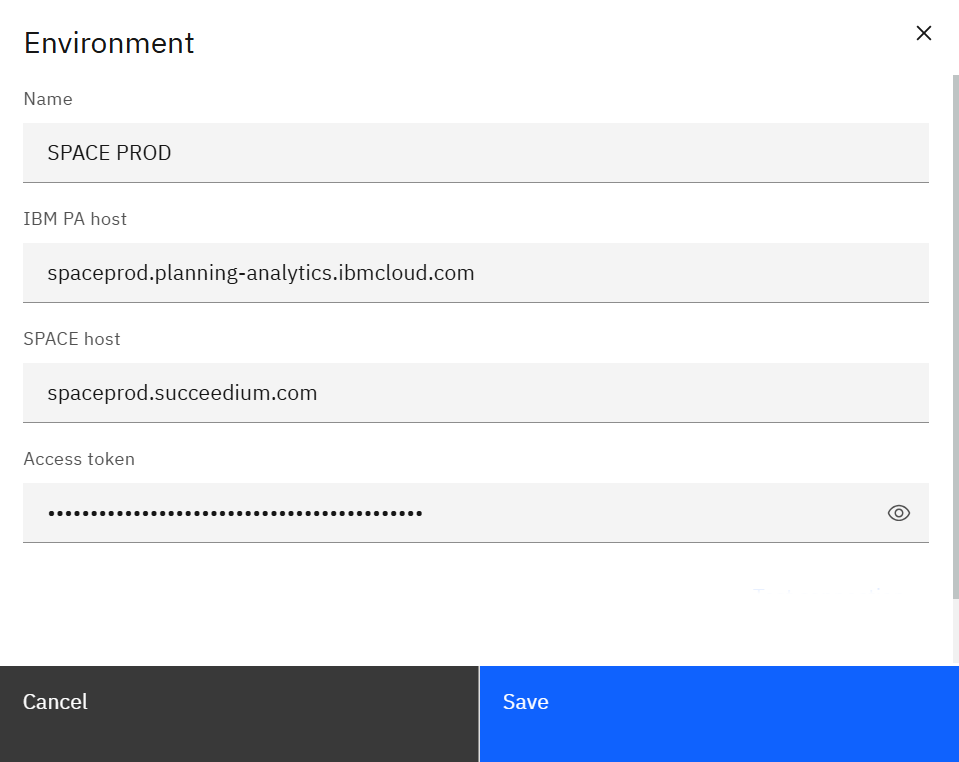
Provide:
- Name – label that appears in the environment selector.
- IBM PA host – your PAW URL (e.g.,
spaceprod.planning-analytics.ibmcloud.com). - SPACE host – the SPACE server URL that proxies requests for this PA environment.
- Access token – your personal SPACE access token. Use the eye icon to verify before saving.
Save the record, then refresh the Environments list so every SPACE user sees the update immediately.
Access
The Access tab controls who can sign in to SPACE and which modules they can use.

Each row shows the user or service account, current status, and assigned role(s). Use the action buttons to invite a new user, create a token, or manage roles.
Inviting users
Click Invite user to send an email invitation.

Provide:
- Email – the IBMid or corporate email that signs into PAW.
- IBM PA host – the PA environment the invite applies to.
- Permissions – toggle Admin access (requires TM1 ADMIN group) or select one or more custom roles.
- Expiry date – optional date to auto-disable the invite.
Creating access tokens
Service accounts and automations authenticate with personal access tokens.
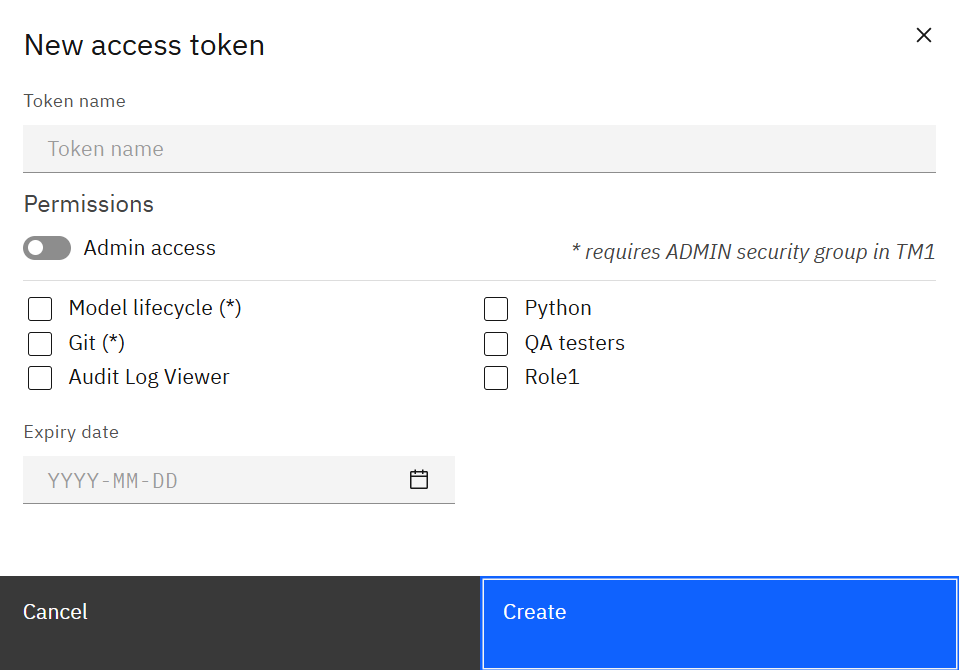
Specify a token name, select the roles or admin access required, and set an expiry date. After creation, copy the token once and store it securely; SPACE does not display it again.
Managing security roles
Roles bundle permissions so you can reuse them when inviting users or creating tokens.

Use New role to define a role name and the modules it grants access to. Editing an existing role immediately updates every user or token that references it. Delete unused roles to keep the list tidy.
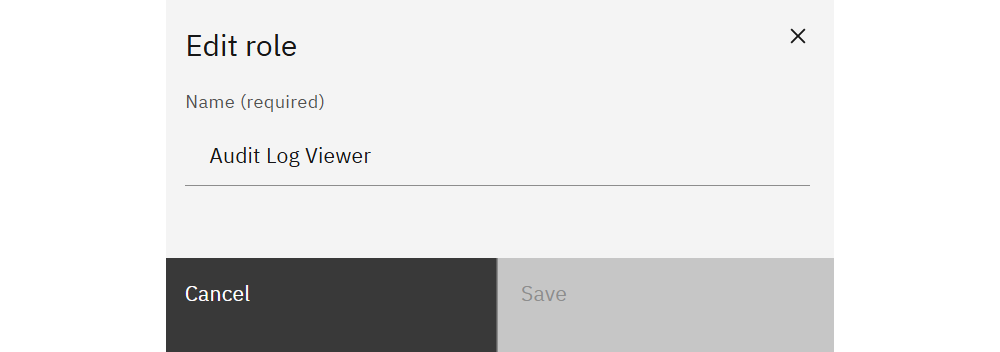
Roles store only a name and the set of module permissions—keep names descriptive (e.g., “Audit Log Viewer”) so administrators can quickly identify the intended access level.
Content
The Content tab tracks all cached datasets SPACE stores (documentation exports, audit logs, server logs, transaction logs).
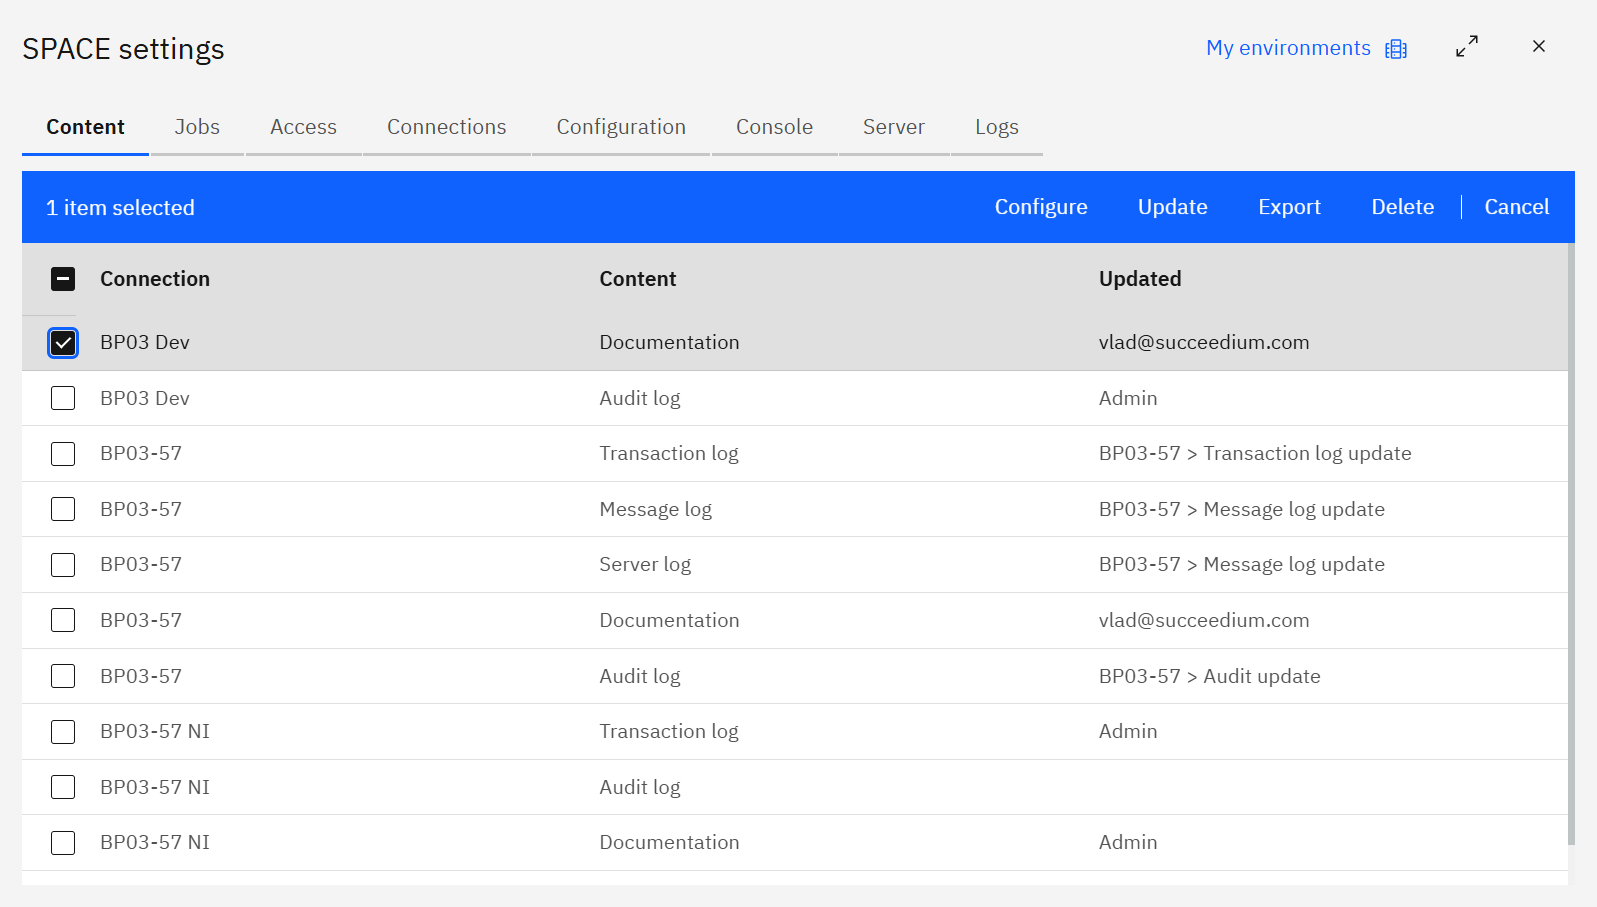
Each row shows the source Connection, Content type, and who last Updated it. Use the toolbar to configure settings, run an update, export data, delete stale content, or cancel selection mode.
Creating content
Click Create to register a new content item.
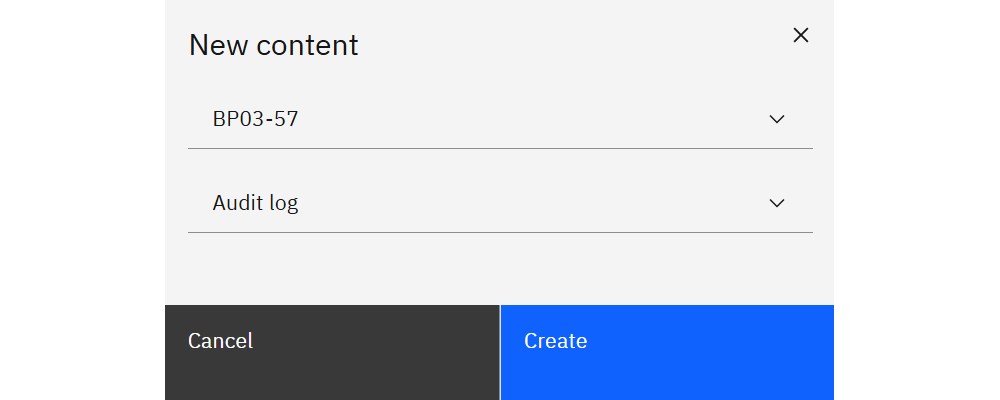
Choose the TM1 connection and content type (Documentation, Audit log, Server log, Transaction log). The new item appears in the table where you can configure retention and run updates.
Configuring content
Select a row and choose Configure to view metadata and adjust settings.
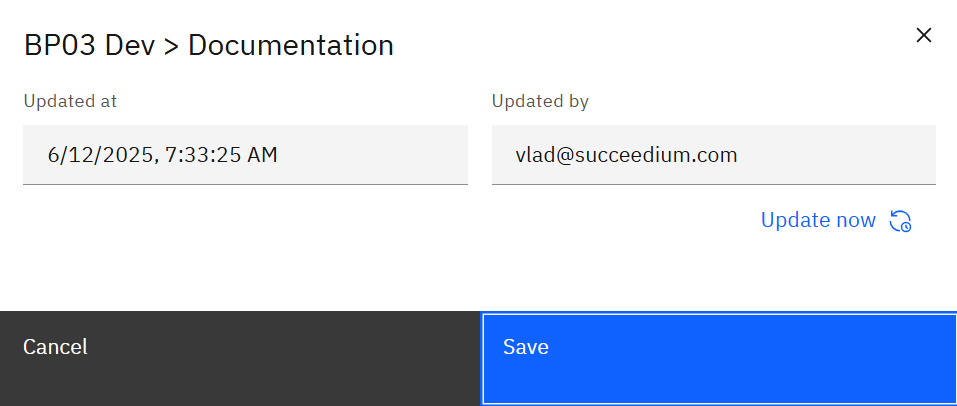
The modal displays:
- Updated at / Updated by – last sync details.
- Update now – trigger an immediate refresh without waiting for the scheduled job.
- Retain months (for log content) – how long data stays available in SPACE.
Updating content manually
If you need to refresh before the next scheduled job, select a row and click Update.
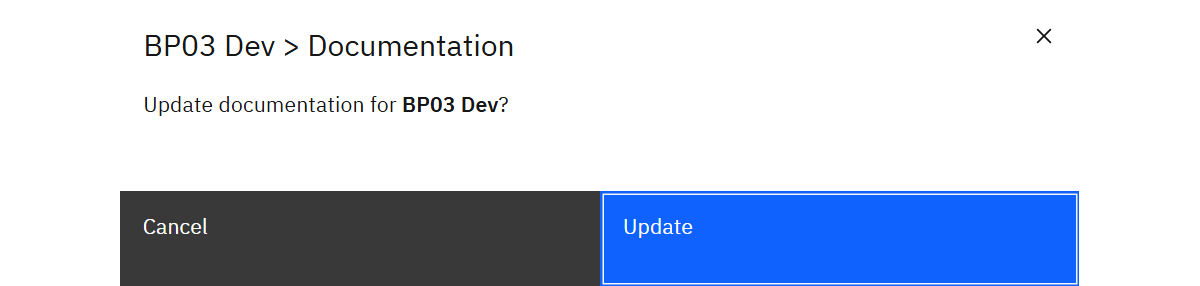
Confirm the prompt to run the update immediately. Use Export from the toolbar to download the current dataset for offline analysis.
Server status
Monitor SPACE infrastructure health on the Server tab.
Each row lists the container Name, current CPU %, MEM usage / limit, and MEM %. Use this view to spot resource spikes and ensure every service has enough capacity. Toggle Auto refresh for near-real-time updates while troubleshooting.
SPACE logs
The Logs tab captures every administrative action inside SPACE.
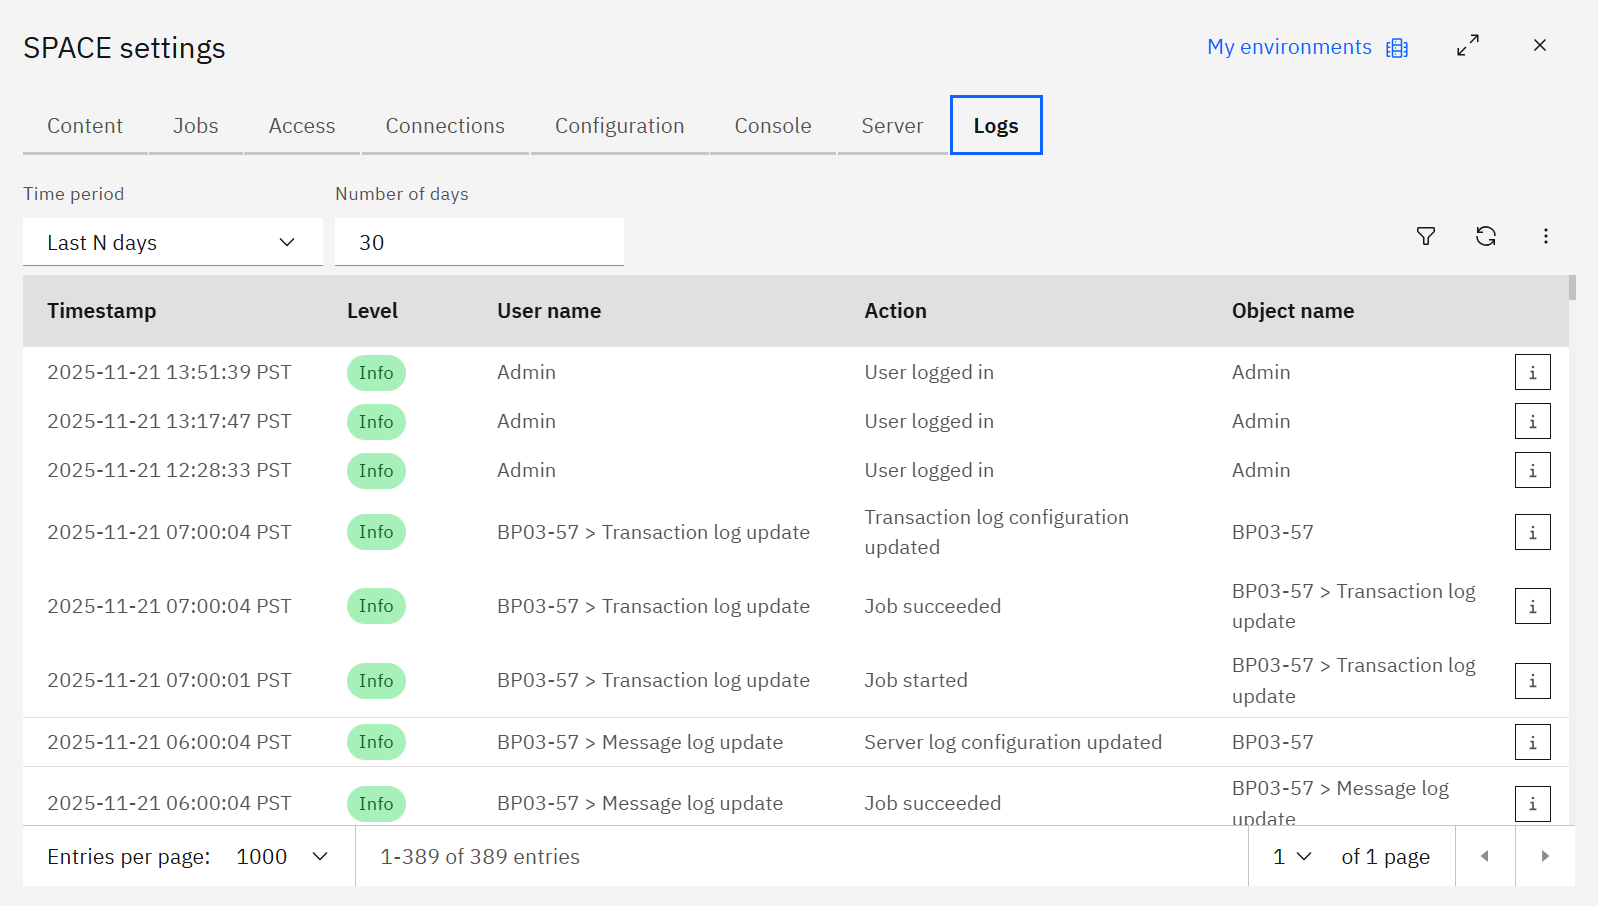
Columns include the Timestamp, log Level, User name, Action, and Object name. Click the Info icon to see the detailed message and copy it for audits.
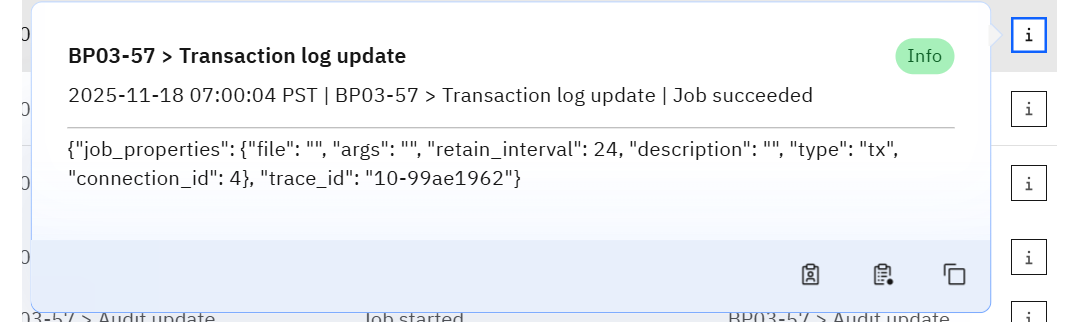
Within the popover you can:
- Filter by the same User or Object using the quick buttons.
- Copy the JSON payload (job properties, trace IDs, etc.) for deeper analysis or support tickets.
Filtering logs
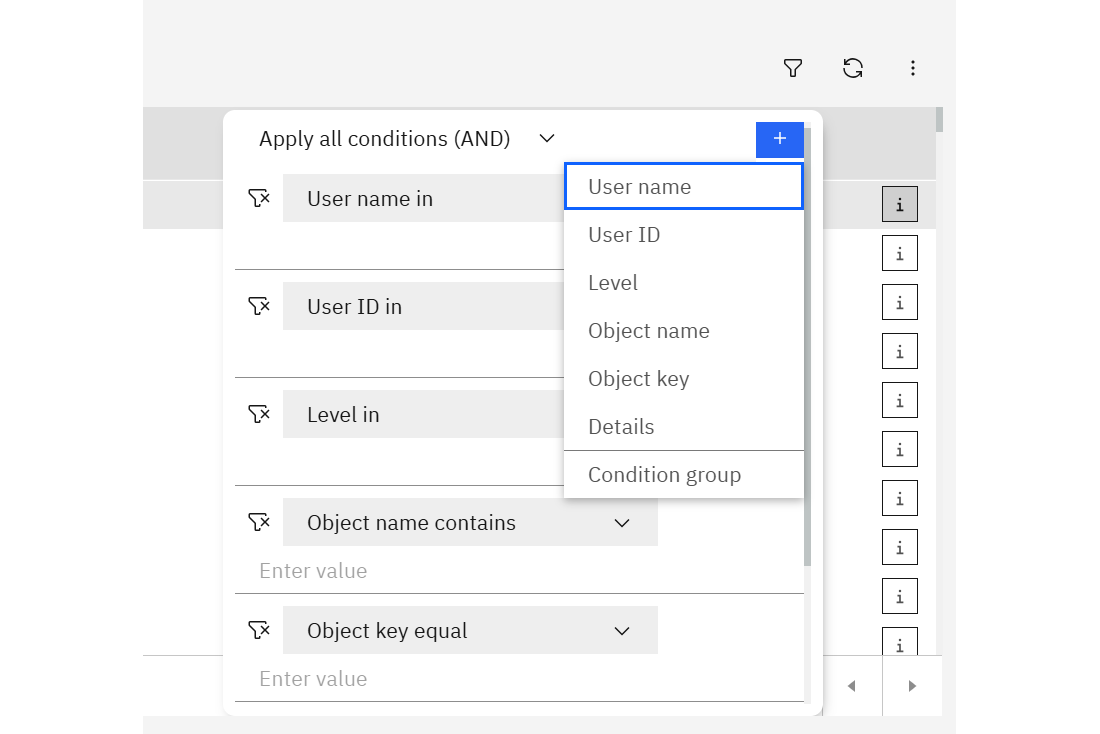
Choose whether to Apply all conditions (AND) or Apply any condition (OR), then add filters for:
- User name or User ID
- Level
- Object name or Object key
- Details (text search)
- Condition group (nest conditions)
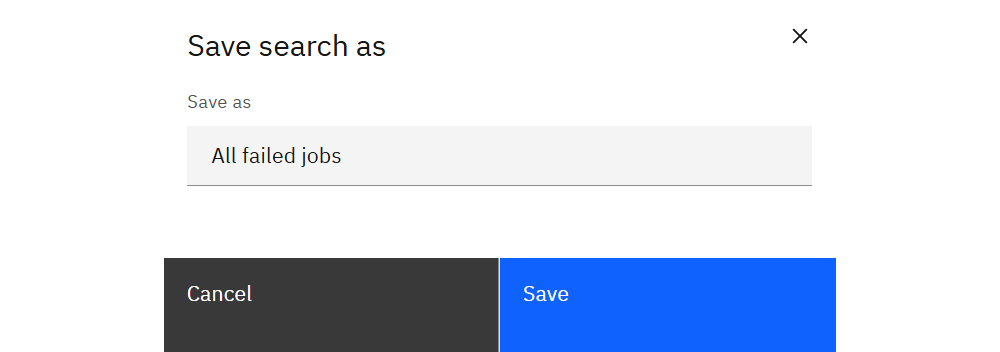
Saved searches and exports
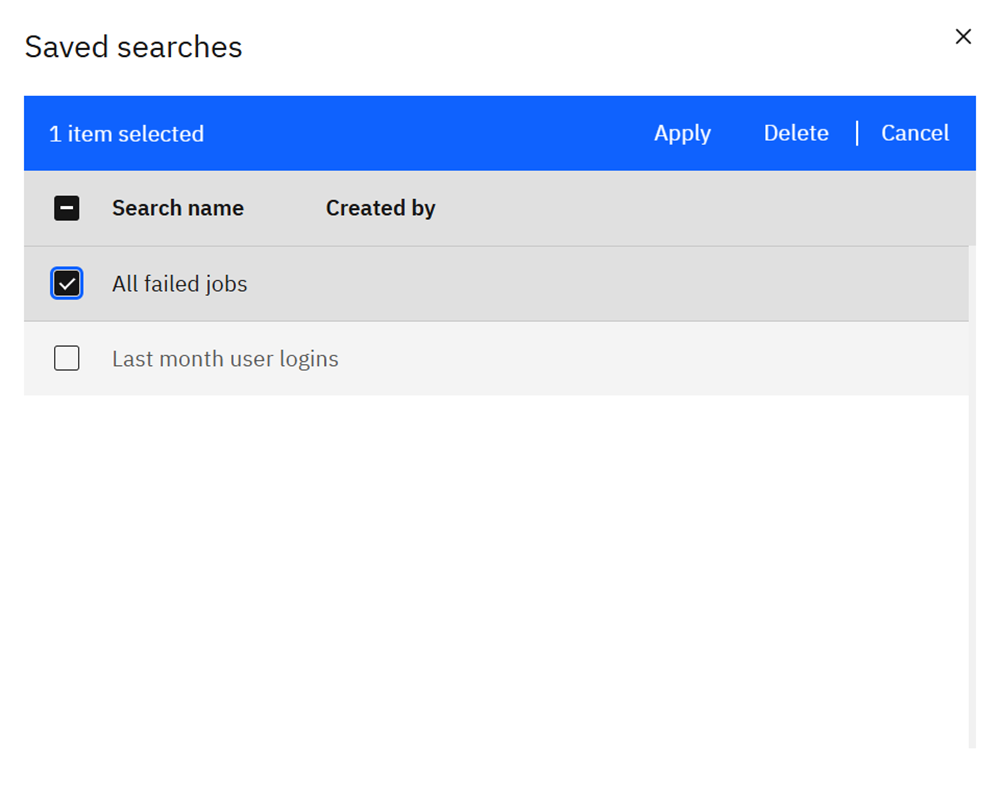
Reuse complex filters by saving them. Click Save search or Save search as to store the current filter set.
Use Open search to apply a saved filter, or Export to download the filtered logs for compliance or offline analysis.
Jobs
Use the Jobs tab to schedule background tasks such as log syncs, documentation refreshes, Python automations, and Git updates.

Jobs table
- Job name – descriptive label (click to edit).
- Status – Active jobs run on the defined schedule; Disabled jobs are paused. Use the toggle on each job to enable/disable.
- Last run / Last result – quick health check for the most recent execution.
- Context menu – run on demand, review history, or delete a job.
Creating a job
Select New job and choose the required job type. Every job shares a few common fields:
| Field | Description |
|---|---|
| Connection | TM1 server used for the job (not shown for Python/Git jobs that do not require TM1). |
| Job name | Auto-generated but editable; use meaningful names for notifications. |
| Scheduled toggle | Enable to run on a cadence; disable for manual execution only. |
| Email notifications | Comma-separated list of recipients. |
| Notification type | Choose Success + Error, Success only, Error only, or No notifications. |
| Include job details | Attach job metadata to notification emails. |
Scheduling options apply to every job:
| Field | Description |
|---|---|
| Schedule | Cron expression that defines when the job runs. Cron uses five fields (minute, hour, day of month, month, day of week). For example, 0 1 * * * runs daily at 1:00 AM, while 30 5 * * 1-5 runs at 5:30 AM on weekdays. |
| Schedule templates | Quick presets (Everyday 1 PM, Every weekday 5:30 AM, Every Saturday at noon, Every hour, Every 30 minutes) that auto-populate the Schedule field with the appropriate cron string. Select a preset or manually enter a custom cron expression to match your scheduling needs. |
Each job type adds extra fields. The log-focused jobs share the same inputs.
| Job type | Additional fields | Purpose |
|---|---|---|
| Documentation update | Connection (required) | Refreshes model documentation for the selected TM1 server. |
| Audit log update | Sync interval (hours), Retain logs (months), Connection (required) | Pulls TM1 audit logs into SPACE on the defined cadence. |
| Server log update | Sync interval (hours), Retain logs (months), Connection (required) | Pulls TM1 server logs into SPACE on the defined cadence. |
| Transaction log update | Sync interval (hours), Retain logs (months), Connection (required) | Pulls TM1 transaction logs into SPACE on the defined cadence. |
| Python script | Script file path, Arguments | Runs a stored Python script with optional parameters. |
| Git update | Git repository, Action (Pull, Push, etc.) | Automates Git sync tasks for connected repositories. |
Configure the fields, test if necessary, then click Create. Jobs can be edited later to adjust schedules, notifications, or parameters.
Connections
Connections define how SPACE talks to each IBM Planning Analytics server.
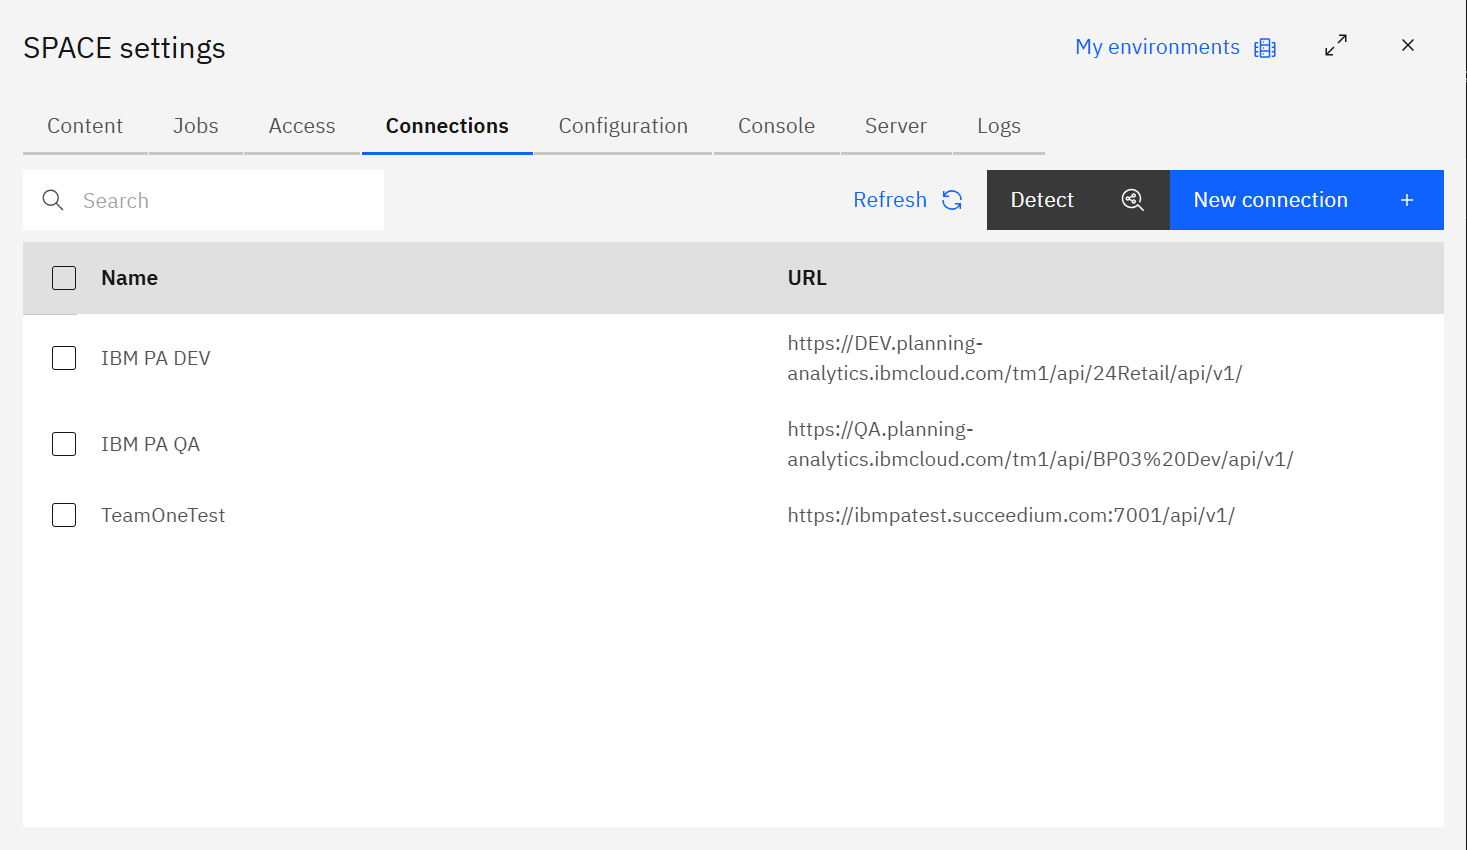
The table displays the name and REST API URL of every registered server. Use Detect to discover PA servers that SPACE can reach, or select rows to edit/delete existing connections.
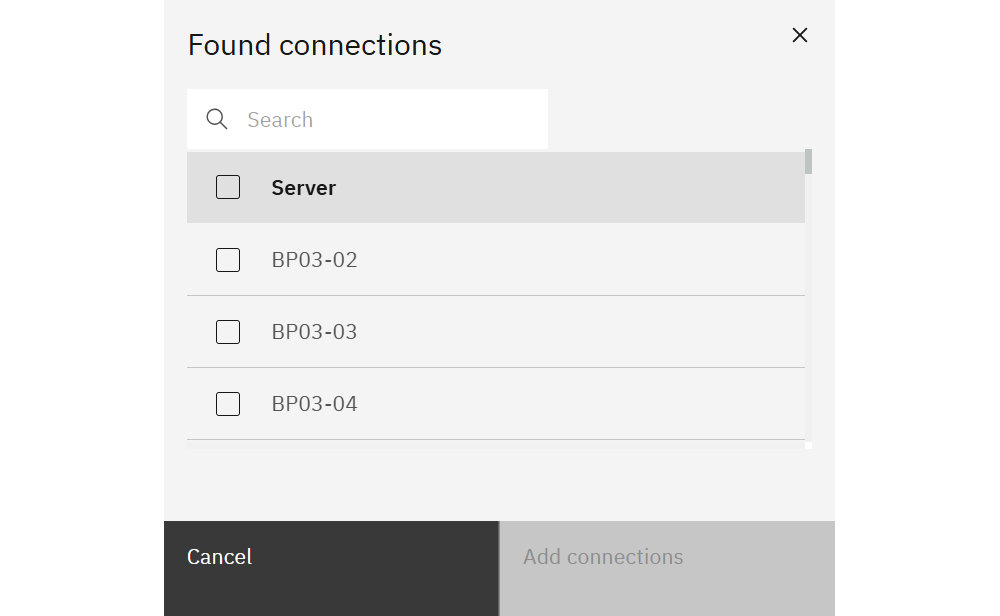
Detecting servers
Click Detect to scan the current environment for TM1 endpoints. Select any results to add them automatically.
Creating or editing a connection
Choose New connection (or open an existing one) to configure the server details.
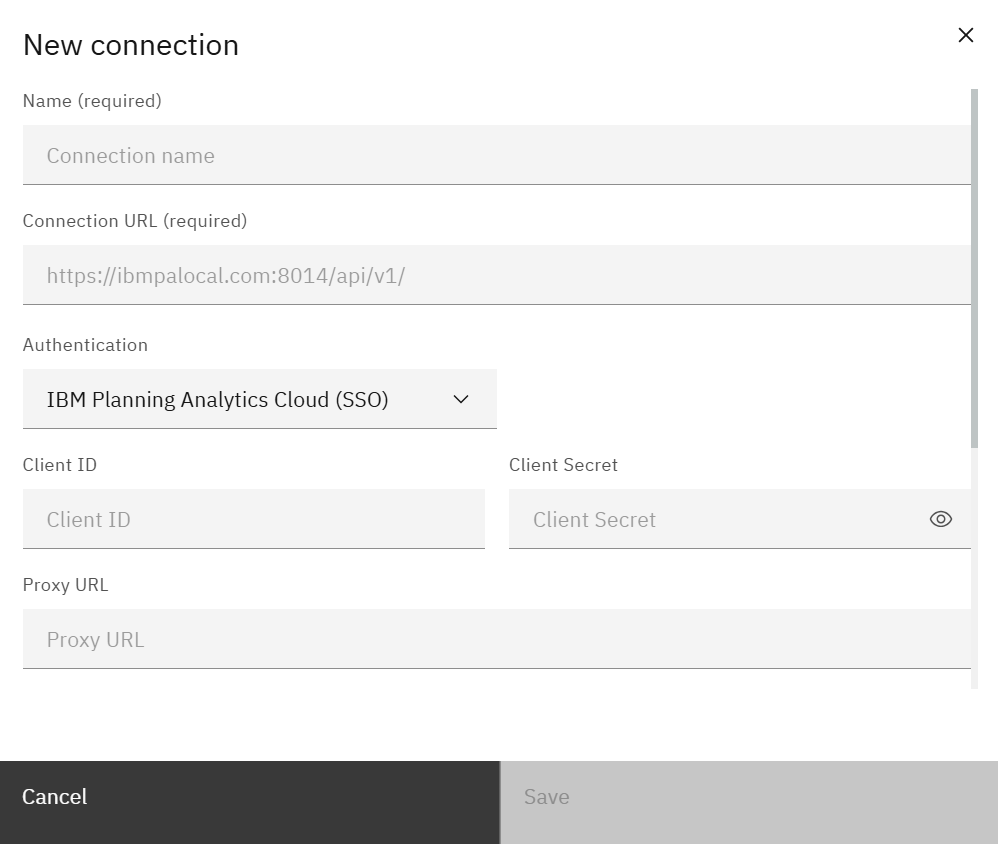
Provide:
- Connection name – friendly label used throughout SPACE.
- Connection URL – TM1 REST API endpoint (e.g.,
https://servername:8014/api/v1/). - Authentication – pick the method that matches your deployment:
- IBM Planning Analytics Cloud (SSO)
- IBM Planning Analytics Cloud (Non-Interactive)
- IBM Planning Analytics Local (SSO)
- IBM Planning Analytics Local (CAM)
- IBM Planning Analytics Local (Basic)
- Client ID / Secret / Proxy URL – fields vary based on the authentication method.
Use the built-in Test connection button to validate credentials before saving. After a connection is active you can optionally add Job credentials (service account used by schedules) and limit Connection access to specific roles so only approved users can trigger jobs or queries against that server.